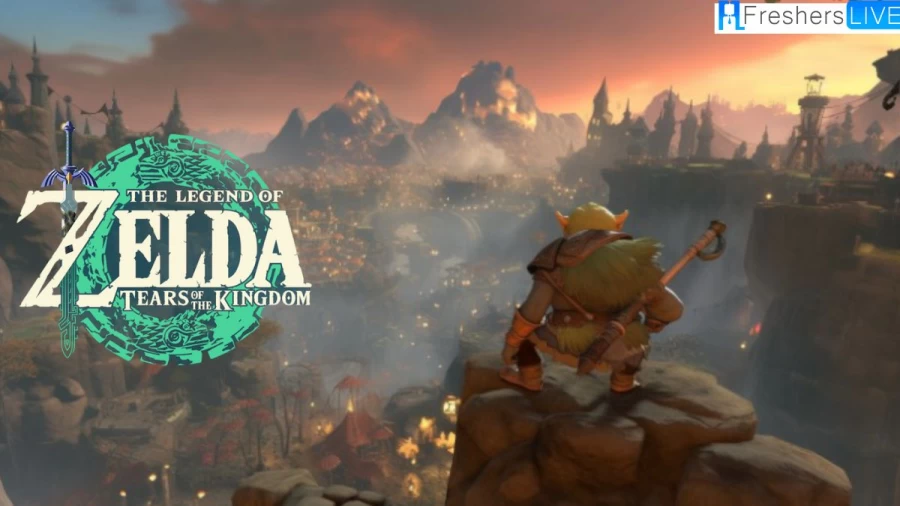
Goron City Location TotK, How to Get to Goron City?
by A N Rahul
Updated Jun 05, 2023

Goron City Location TOTK
There are two ways to reach Goron City, and I'll provide you with both options. First, you can head towards Pico Pond and visit the Woodland Stable located there. From the stable, you can ride your horse along the northeastern path that goes through Goronbi River. Keep following the path, and eventually, you'll reach Goron City.
I recommend taking this route because you can purchase Sunset Fireflies from Beedle at the stable. We can use these fireflies to create Heat Resistant elixirs, which will be helpful as we approach Death Mountain.
Alternatively, you can go up Eldin Canyon Skyview Tower and glide as far north as possible. Once you land, continue heading north along the path through Goronbi River until you reach Goron City.
Finding Yunobo in Goron City in Zelda: Tears of the Kingdom
Upon entering Goron City in Zelda: Tears of the Kingdom, start by speaking with the gorons gathered in the center. You'll meet Yunobo, who will then go to YunoboCo HQ to attend to some business related to "marbled rock roast."
Before following the group to YunoboCo HQ, visit the armor store in Goron City and purchase the Flamebreaker Guard Armor. The complete set will cost you 2000 Rupees, so if you don't have enough, you can gather gems by farming the cliffsides outside of Goron City. There's a merchant in the city who will buy these minerals at a good price.
Once you have enough Rupees, you'll be able to obtain the Flamebreaker Armor quickly. We'll need this armor for the latter part of the quest, as things will start heating up.
Keep in mind that when it gets hot, any wooden gear attached to Link will catch fire, causing damage to his HP. Therefore, when you switch to the Flamebreaker Armor, make sure you have either metal or Zonai-based gear equipped.
When you're ready, make your way to YunoboCo HQ by following the path north out of Goron City. Proceed deeper into the cave to find Yunobo, who is behaving strangely. In fact, he prepares to fight Link.
Don't worry too much about this fight. Yunobo's primary attack involves curling up into a ball and rolling towards Link. You need to run circles around Yunobo so that he crashes into one of the walls.
Once Yunobo crashes into a wall, approach him and attack. This will gradually break his mask. Repeat this process three times, and the fight will be over.
After breaking free from the influence of the mask, Yunobo will become your companion for the remainder of your Goron City adventure.
Next, exit the cave. This is where you'll learn how to utilize Yunobo's Power of Fire. He can curl up into a ball and charge at rocks blocking Link's path. The large red rocks found in the cave can only be broken using Yunobo's ability, so keep that in mind.
To mark a notable location on your map, there's a place called Bedrock Bistro near Goronbi Lake on the south side of the mountain. Timawak Shrine is also located nearby. Speaking with the people at Bedrock Bistro will provide insights into what's happening in Goron City and inform you about the marbled rock roast.
Reaching Goron City from this point is relatively easy. Simply follow the path north. Most of the lava in the area has solidified, so you don't need to worry about taking damage. However, if you plan to explore the caves in the region, make sure you have flame-proof elixirs. Follow the lanterns and mining signs for a safe route to the city.
How to get to Goron City TOTK?
To reach Goron City in Tears of the Kingdom, there are two primary routes you can take. Let me explain both options to you.
Option 1: From Pico Pond and the Woodland Stable
With the map visible, head towards Pico Pond and make a stop at the Woodland Stable located there. Once you've arrived, saddle up on your horse and ride northeast along the path that runs through Goronbi River. Keep following this path, and eventually, you will arrive at Goron City.
I highly recommend this route because while you're at the stable, you can purchase Sunset Fireflies from Beedle. These fireflies can be transformed into Heat Resistant elixirs, which will come in handy as you venture closer to Death Mountain.
Option 2: Via Eldin Canyon Skyview Tower
Another way to reach Goron City is by heading up Eldin Canyon Skyview Tower. From there, glide as far north as possible. Once you land, continue moving north along the path that passes through Goronbi River. This path will lead you straight to Goron City.
As mentioned earlier, the Skyview Tower in this region is an excellent starting point, and along the way, you'll encounter various landmarks that will help you gauge your progress. Additionally, if you head south from the Tower, you can acquire Dragon's Tear #3.
Now, let's delve into more details about the area surrounding Goron City.
To familiarize yourself with the surroundings, make a note of Bedrock Bistro, situated near Goronbi Lake on the mountain's south side. Adjacent to the bistro is Timawak Shrine. Interacting with the locals at Bedrock Bistro will provide you with valuable insights into the happenings in Goron City, including information about the marbled rock roast.
Reaching Goron City from this point is relatively straightforward. Simply follow the path heading north. Fortunately, much of the lava in the area has solidified, so you won't have to worry about taking damage. However, if you plan to explore the numerous caves in the region, it is imperative to have flame-proof elixirs in your possession. Follow the lanterns and mining signs to ensure a safe and direct path to the city.
Where is Goron city TOTK?
Goron City is located in the Eldin region, right next to Death Mountain. To help you find your way, there are a couple of key landmarks to keep in mind.
Firstly, Bedrock Bistro near Goronbi Lake on the south side of the mountain is a great reference point. It's a good idea to mark it on your map. Adjacent to the bistro, you'll find Timawak Shrine. Speaking with the locals at Bedrock Bistro will provide valuable information about the happenings in Goron City, including details about the marbled rock roast.
Reaching Goron City from this location is actually quite straightforward. Simply follow the path heading north. Much of the lava in the area has solidified, so you needn't worry about taking damage. However, if you plan on exploring the numerous caves in the region, it's essential to have flame-proof elixirs with you. Follow the lanterns and mining signs to navigate a safe and steady path to the city.
If you're having trouble locating Goron City, there's a helpful method to make it easier. Start by heading to Elden Canyon Skyview Tower. Once you've activated this tower, the Eldin province will be revealed on your map. This makes it significantly easier to find Goron City. Simply look directly north of the Skyview Tower, and you'll spot a cluster of buildings with a bridge spanning across the center.
That's Goron City. You can glide over to it effortlessly from the Skyview Tower. If you still encounter difficulties, refer to the map below for the exact location of Goron City.
Once you arrive at Goron City, there are several things to do and discover. One of the Regional Phenomena quests takes place here, so you'll likely tackle that first. Additionally, you can purchase a set of Flamebreaker armor at Goron City, which provides protection from the scorching heat of Death Mountain.
You can also embark on the "Soul of the Gorons" quest, which rewards you with the Boulder Breaker. With the abundance of activities available, reaching Goron City should be a priority in your Tears of the Kingdom adventure.
Goron City Walkthrough
Chapter 1 – Great Plateau
1.1 – Great Plateau Tower
1.2 – Oman Au Shrine
1.3 – Ja Baij Shrine
1.4 – Owa Daim Shrine
1.5 – Keh Namut Shrine
1.6 – The Paraglider
1.7 – Great Plateau Goodies
Chapter 2 – Dueling Peaks
2.1 – Dueling Peaks Tower
2.2 – Dueling Peaks Stable
2.3 – Kakariko Village
2.4 – Dueling Peaks Goodies
Chapter 3 – Hateno Village
3.1 – Hateno Tower
3.2 – Hateno Ancient Tech Lab
3.3 – Locked Memories
Chapter 4 – Zora's Domain
4.1 – Lanayru Tower
4.2 – Zora's River
4.3 – Zora's Domain
4.4 – Ploymus Mountain
4.5 – East Reservoir Lake
Chapter 5 – Vah Ruta Dungeon
5.1 – Dungeon Map
5.2 – First Terminal
5.3 – Second Terminal
5.4 – Third Terminal
5.5 – Fourth Terminal
5.6 – Fifth Terminal
5.7 – Waterblight Ganon
Chapter 6 – Goron City
6.1 – Foothill Stable
6.2 – Eldin Tower
6.3 – Southern Mine
6.4 – Goron City
6.5 – Abandoned North Mine
6.6 – Death Mountain
Chapter 7 – Vah Rudania Dungeon
7.1 – Dungeon Map
7.2 – 1st Terminal
7.3 – 2nd Terminal
7.4 – 3rd Terminal
7.5 – 4th Terminal
7.6 – 5th Terminal
7.7 – Fireblight Ganon
Chapter 8 – Gerudo Town
8.1 – Wasteland Tower
8.2 – Gerudo Canyon Stable
8.3 – Kara Kara Bazaar
8.4 – Gerudo Town
8.5 – Karusa Valley
8.6 – Gerudo Desert
Chapter 9 – Vah Naboris Dungeon
9.1 – Dungeon Map
9.2 – 1st Terminal
9.3 – 2nd Terminal
9.4 – 3rd Terminal
9.5 – 4th Terminal
9.6 – 5th Terminal
9.7 – Thunderblight Ganon
Chapter 10 – Rito Village
10.1 – Central Hyrule
10.2 – Ridgeland Tower
10.3 – Tabantha Tower
10.4 – Rito Village
10.5 – Flight Range
Chapter 11 – Vah Medoh Dungeon
11.1 – Dungeon Map
11.2 – 1st Terminal
11.3 – 2nd Terminal
11.4 – 3rd Terminal
11.5 – 4th Terminal
11.6 – 5th Terminal
11.7 – Windblight Ganon
Chapter 12 – Hyrule Castle
12.1 – Castle Town Ruins
12.2 – Hyrule Castle
12.3 – Calamity Ganon
Goron City Location TOTK-FAQs
There are two ways to reach Goron City. You can either ride your horse from the Woodland Stable along the northeastern path through Goronbi River, or you can glide from Eldin Canyon Skyview Tower and head north along the path through Goronbi River.
Upon entering Goron City, speak with the gorons gathered in the center. You'll meet Yunobo, who will go to YunoboCo HQ to attend to some business related to "marbled rock roast." Follow the group to YunoboCo HQ, but before that, make sure to purchase the Flamebreaker Guard Armor from the armor store in Goron City.
Yunobo will prepare to fight Link, but it's not a challenging battle. Avoid his attacks by running circles around him, causing him to crash into a wall. When he crashes, approach and attack him to break his mask. Repeat this process three times to defeat him.
After defeating Yunobo and breaking his mask, he will become your companion. Exit the cave and learn how to utilize his Power of Fire. He can curl up into a ball and charge at rocks blocking Link's path. Use this ability to break large red rocks in the cave and progress further.


