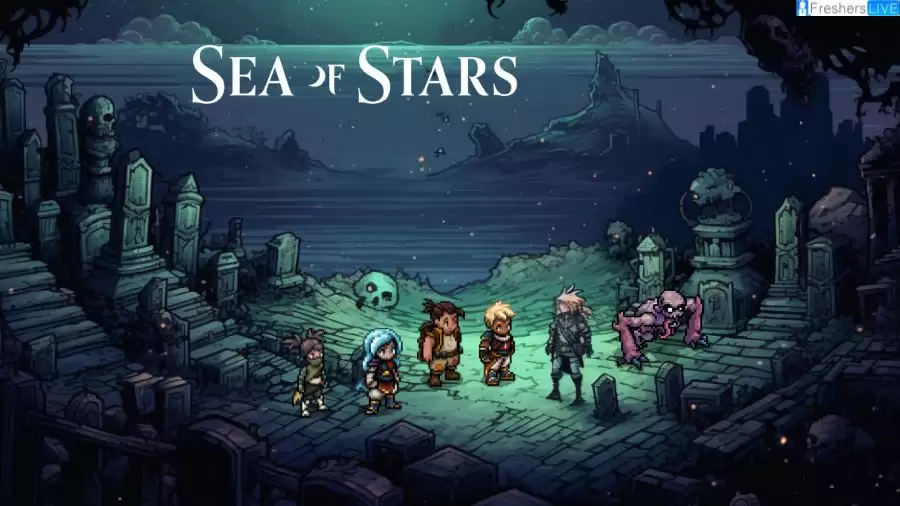
Sea Of Stars Flooded Graveyard Guide, Chest Locations and Walkthrough
by Damodharan N
Updated Sep 12, 2023

Sea Of Stars
"Sea of Stars" is a role-playing video game developed by Sabotage Studio and released in 2023. It's set in the same universe as their previous game, "The Messenger." In this game, players assume the roles of two young heroes, Valere and Zale, who wield the power of the sun and moon to combat a formidable alchemist threatening their world.
The game offers engaging turn-based combat that rewards well-timed actions and combo attacks. It features a unique navigation system that allows players to seamlessly explore the game world without the constraints of traditional grid-based movement.
"Sea of Stars" also boasts a rich narrative, filled with original characters and captivating story arcs that delve into classic themes of adventure and friendship. The world is brought to life with dynamic lighting, including day and night cycles, weather effects, and more, adding depth and immersion to the experience
Sea Of Stars Flooded Graveyard Guide
In the world of the Sea of Stars, the Flooded Graveyard plays a pivotal role in the quest to rescue Garl from the Dweller of Woe's curse. This guide leads you through the essential steps to locate the Soul Stone within Romaya the necromancer's lair. To begin, after leaving the Cursed Woods, engage in a cutscene with Zale, Valere, and the assassin Seraï, who reveals that saving Garl necessitates a journey to the Necromancer's Lair, reachable only with the assistance of the Ferryman.
Departing from Lucent, head east to the port, where Seraï exchanges the Coin of Undeath Accord for passage. Within the Flooded Graveyard, you'll confront various enemies, discover a hidden chest with Shimmering Daggers, and meet a nameless NPC who serves Romaya.
Defeat Gulgul enemies, cross beams for a Hearty Stew recipe, and eventually encounter Duke Aventry, engaging in a boss battle to obtain the Dash Strike skill, all while progressing toward the goal of securing the Soul Stone and breaking Garl's curse in Sea of Stars. Below is a teaser for the sea of stars flooded graveyard released by sabotage studies
Sea of Stars Flooded Graveyard Chest Locations
In the mystical realm of Sea of Stars, adventurers traversing the treacherous Flooded Graveyard will find themselves in need of valuable treasures to aid them on their journey. Here is a comprehensive guide to the chest locations within this enigmatic locale:
Chest #1:
As you embark on your first battle, head northward, but veer to the right. Continue your northward journey until you come across a chamber entitled "Solstice Warriors." Venture inside to discover a climbing area housing your first chest.

Image source: Youtube
Chest #2:
After your initial encounter with the Graveyard Keeper, explore the ruins of a nearby building. Ascend to its rooftop to unveil another hidden chest.

Image Source: Youtube
Chest #3:
Adjacent to the previous chest, an opening in the roof presents itself. Descend through this hole in the center to find yet another treasure chest.

Image Source: Youtube
Chest #4:
Submerge into the waters adjacent to the location where you faced off against the Graveyard Keeper to spot a chest hidden beneath the surface.
Chest #5:
Following your confrontation with Duke Aventry, navigate the water to locate another chest, rewarding your persistence.
Chest #6:
When your quest requires the acquisition of skulls to access a sealed door, journey northeast into a cave. Progress through this cavernous area until you encounter an area suitable for a skirmish. Engage in battle and, upon victory, operate a nearby switch. This action grants access to a northern platform. Continue your ascent by using another switch and ultimately climb to a higher elevation where a chest awaits.
Chest #7:
Subsequent to obtaining the previous chest, extend a ladder downwards, then journey southward to activate a switch once more. Ascend the ladder to reach a platform with access to the lower-right corner of the area, where you will find another chest.
Chest #8:
This chest is unmissable and forms a part of your mandatory progress within the Graveyard.

Image Souce: Youtube
Chest #9:
Exiting the room mentioned earlier, experiment by stepping on switches to raise posts. Employ your trusty grappling hook to navigate this area, serving as a tutorial for its use. Along the way, you may even discover some berries. This path will eventually lead you back to your starting point in the room. Now, ascend a ladder to the north, grapple onto enemies in the northeast corner, engage them in battle, and claim the chest once the battle concludes.
Chest #10:
Commencing from the primary area where you procured your first skull, follow the western entrance. In this section, you'll realize the need for your grappling hook from the outset. Utilize it on a circular rung to dislodge a portion of the ground, revealing a switch. Activating this switch alters the nearby platforms, granting you access to them. Subsequently, you can reach a door in the northeast corner, behind which lies another chest.
Chest #11:
Following your triumph over the third revenant, do not hastily depart from the area where the battle occurred. Instead, veer to the right, passing through a section adorned with green candles and bones. Continue onwards until you discover a chest containing the coveted Revenant Armor.
Chest #12:
After your decisive confrontation with Romaya, retrace your steps to the initial area. Now, tread along the stumps leading northeast/northwest to gain entry to a previously inaccessible chamber. Here, you'll encounter an intricate puzzle. Employ your grappling hook on the left and right hooks with precision, navigating swiftly between them to activate a chest, rewarding your ingenuity.

Image source: Youtube
These chest locations serve as beacons of hope, offering essential items, equipment, and insights to those daring souls who embark on their quest through the mystifying Flooded Graveyard in Sea of Stars.
Sea Of Stars Flooded Graveyard Walkthrough
In the world of Sea of Stars, the Flooded Graveyard is a crucial location in the quest to save Garl from the Dweller of Woe's spell. To achieve this, you must find a Soul Stone, and this guide will walk you through the steps to locate the Soul Stone in Romaya the necromancer's lair.
Help from the Ferryman:
Enemy Information: Gulgul
- Weakness: Poison attacks
- Resistance: None
- Gulguls primarily use random attacks seen in previous enemy encounters.
The Flooded Graveyard:
Boss Fight: Duke Aventry
With Duke Aventry's defeat, you gain the Dash Strike combat skill and the opportunity to enter Romaya's home, bringing you one step closer to acquiring the Soul Stone and saving Garl from the Dweller of Woe's spell. Good luck on your journey in the Sea of Stars!
Sea Of Stars Flooded Graveyard Guide - FAQs
The Flooded Graveyard in Sea of Stars is a crucial location where adventurers embark on a quest to save Garl from a curse
The first chest is located northward from your initial battle; follow a path to the right to reach a chamber called "Solstice Warriors."
The boss enemy of the Flooded Graveyard in Sea of Stars is Duke Aventry
The Dash Strike skill is taught by Duke Aventry after defeating him in a boss battle in the Flooded Graveyard.
To defeat Duke Aventry in the Flooded Graveyard of Sea of Stars, focus on blocking his powerful club strikes and break his Locks immediately, then unleash strong attacks to chip away at his health


